
What are the requirements?
1. Create and set up a Retail Time POS account
2. Create and set up your hosting account (AWS lightsale, Godaddy, 1and1)
3. Install WordPress and WooCommerce
4. Connect Retail Time POS with WooCommerce
What is Retail Time POS?
Retail Time is a cloud-based POS platform that is ideal for the retail and hospitality industries. Retail Time POS is easy to use, cross-platform, and available on All-in-One devices, Android tablets, Windows PCs, and the Poynt terminal. It fully supports EMV payments, inventory, customers, employee management, and much more. It also provides a fully integrated online and offline solution with a POS, self-serve kiosks, online ordering capabilities, loyalty programs, and other valuable apps.
What is WordPress?
WordPress is the most popular open-source content management system (CMS) for building and managing websites. It now powers over 35% of all the websites on the Internet! And it’s absolutely free, licensed under GPLv2. WordPress is also very easy to install and use, even for those who do not know anything about programming.
What is WooCommerce?
WooCommerce is a WordPress eCommerce plugin. It is also open-source and completely free. Getting started is easy. Simply add the WooCommerce plugin to your WordPress site and then configure your store in minutes. With eCommerce, you can have all your products listed and fully synced with Retail Time POS, and accept secure payments, all out of the box–for free.
1. Create and set up a Retail Time POS account
First, contact your retail time sales team to sign up. You will receive a Retail Time welcome email with your account credentials and links to log in to your POS and Back office area.
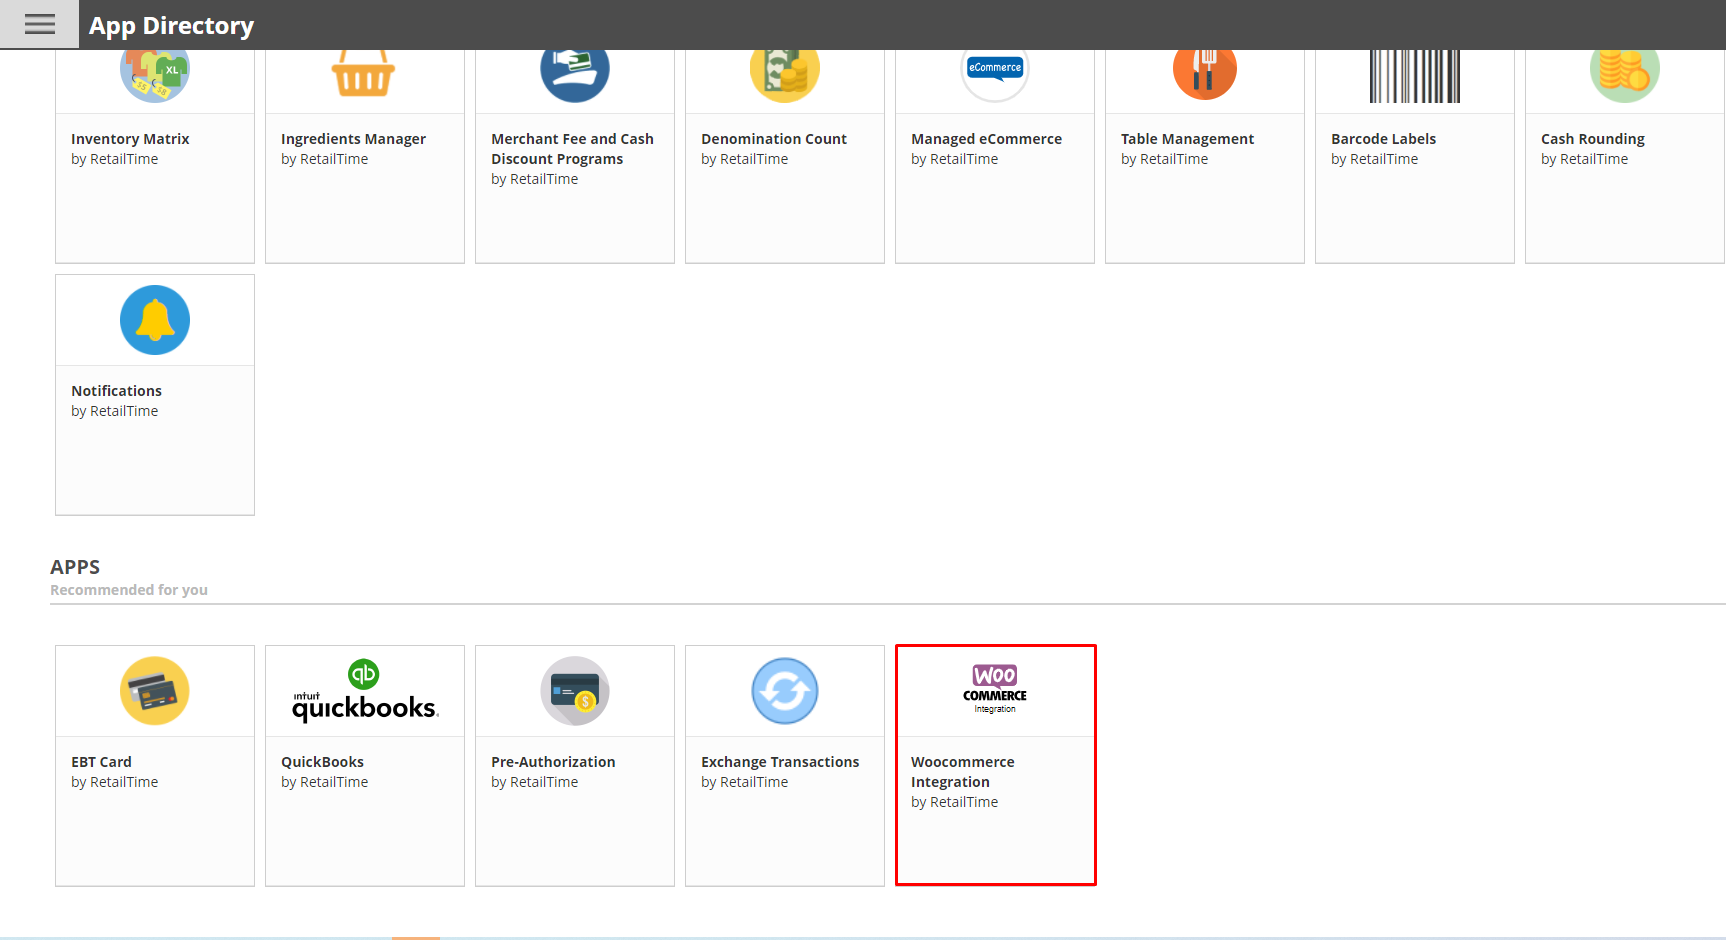
To install the Woocommerce Integration app, go to the App Directory in the left menu, select the Woocommerce Integration app button.
2. Create and set up your hosting account (AWS lightsale, Godaddy, 1and1)
If you have an Amazon AWS account, log in. If you do not yet have an account, create one at https://aws.amazon.com and then log in. Also, we tested Woocomerce and Retail Time POS integration on Godaddy and 1and1.
3. Install WordPress and WooCommerce
Follow WordPress and Woocomerce instructions to install it on your hosting account.
WordPress configuration
1) Install WordPress version 5.8 WordPress.com.
2) Install WooCommerce version 5.5 Installing and Uninstalling WooCommerce – WooCommerce Docs
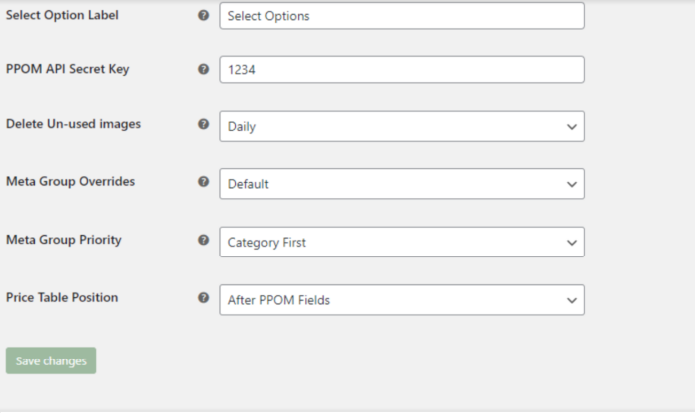
3) Install PPOM for WooCommerce by N-MEDIA plugin and add API code, PPOM for WooCommerce
4) Add the PPOM API secret key (create any key)
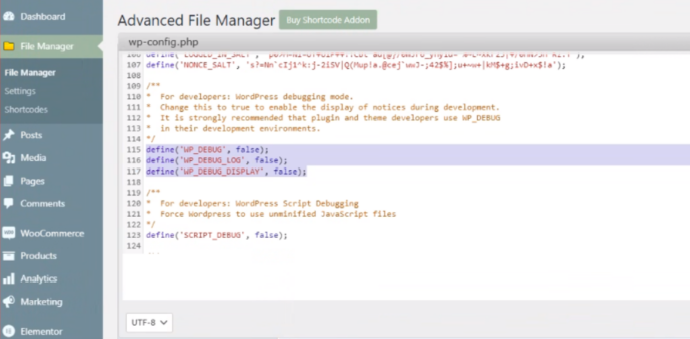
Open the wp-config.php file to enter the code below:
define(‘WP_DEBUG’, false);
define(‘WP_DEBUG_LOG’, false);
define(‘WP_DEBUG_DISPLAY’, false);
To allow Woocommerce API usage open the file .htaccess and at the end of the text on the new line add the following text:
#HTTPS Basic auth enable
SetEnvIf Authorization “(.*)” HTTP_AUTHORIZATION=$1
4. Connect Retail Time POS with WooCommerce
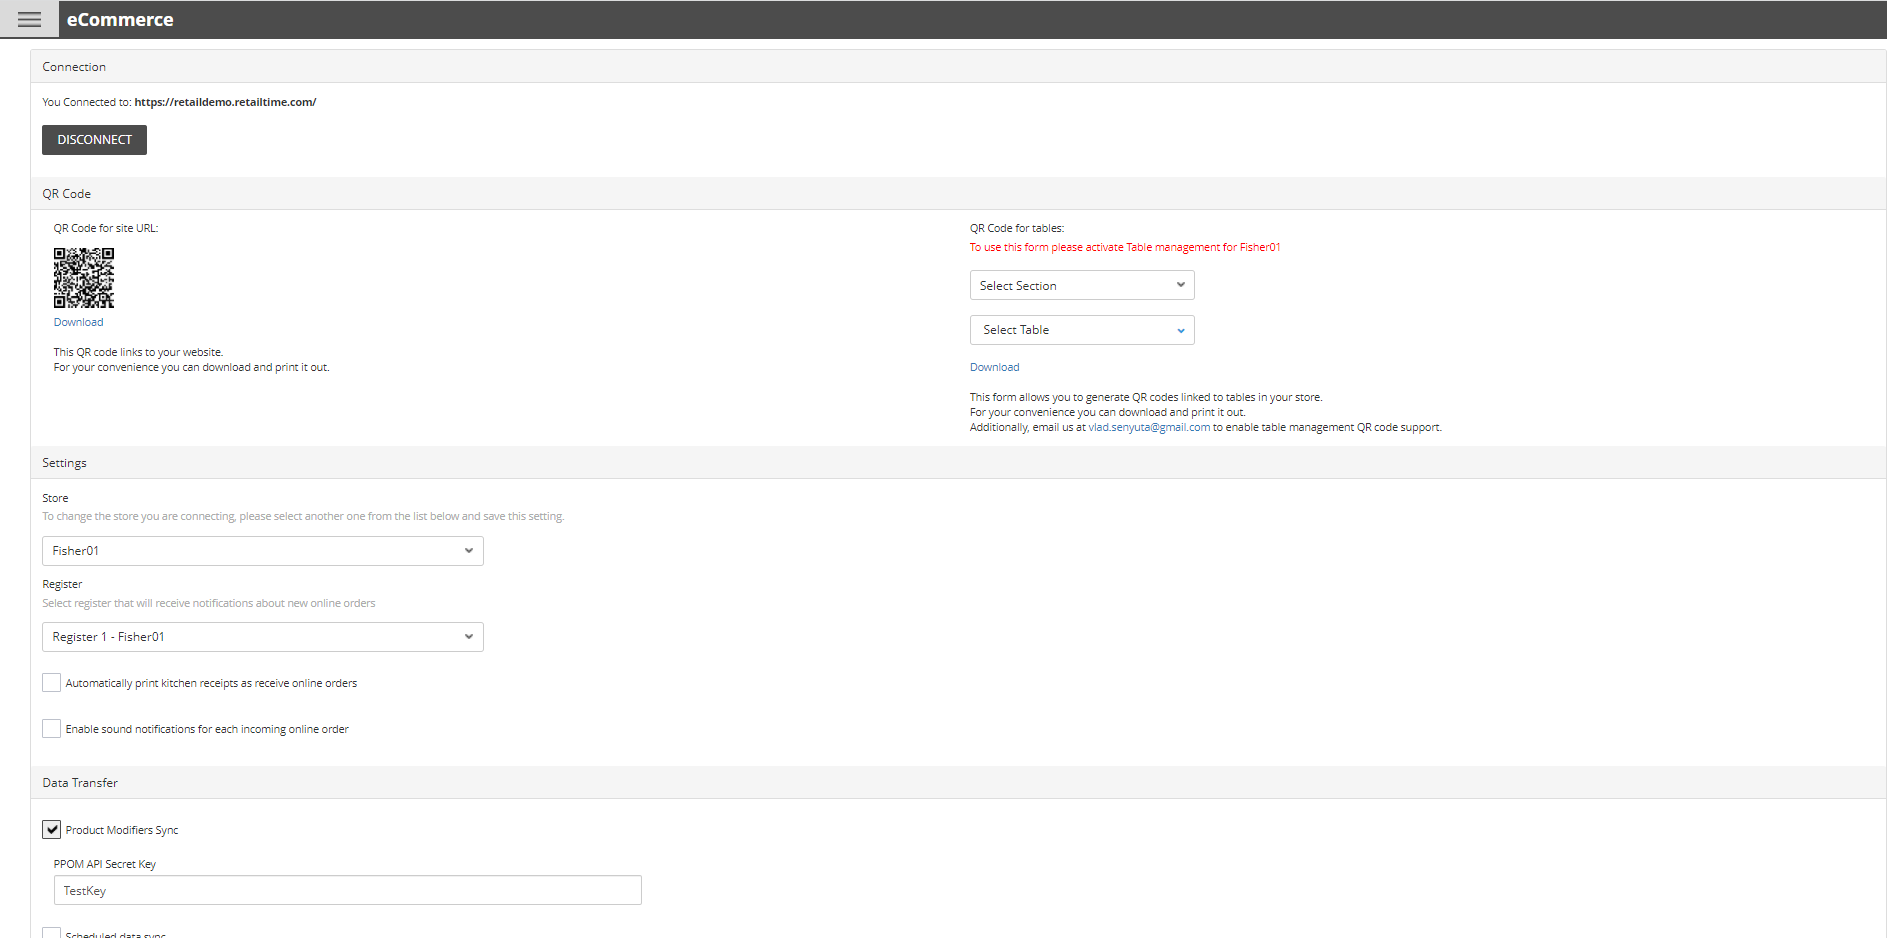
Return to your Retail Time Back Office, and then select the WooCommerce section under Apps in the left menu.
Fill out the form
Enter your WordPress URL in the field and click Connect to connect the site to your Retail Time account.
Select the SYNC NOW button to sync all inventory data from your Retail Time account that you specified to be added to eCommerce onto your WordPress site. If you would like Retail Time to automatically sync with eCommerce at a daily scheduled time, check the Scheduled data sync checkbox and then choose a time.
Need help? Please contact us at support@retailtime.com